
So, I’ve been using the Sock-U-Lator to calculate toe-up socks with a heel flap (I prefer to short-row heels, plus for my Badger-licious socks I needed to be able to pattern the heel and this was the easy way).
However, I find that I’m baffled by the “anatomy” of what I’m doing.
So.
Here’s my play by play of the instructions, complete with photos to clarify for me, God, and Everyone.
So, after using the Super Cool Knitty Cast On and working toe up, eventually you have to add a gusset* if you’re going to use a heel flap (on a 68 st sock for a size 7.5 womens foot):
*L1A=lift one after, so when you’ve made a stitch and need to make a new one, you lift the next loop below the live left-needle stitch (after the gap, get it?). 
Then you prep for the heel turn (though her instructions are a little outta whack):
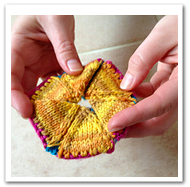
Now, for the complicated part. Once you’ve gotten everything organized, you have to EXPAND the bottom of the foot so you have enough stitches on each side to seam to the heel flap…that you’ll create.
Yeah, I know.
Think of it this way–on the bottom of the foot needle, you already have the gusset stitches. You can’t mess with those, though. You’ve removed them from the active needle. What’s left is actually the bottom of the foot. We need to add stitches* to each side of the bottom of the foot in order to have room there to seam the bottom, flap, and gusset (remember that cool straight seam that runs down the sides of the heel flap? We’re going there in reverse):
*L1B=lift one before, so when you’ve made a stitch and need to make a new one, you lift the next loop below the live right-needle stitch (before the gap, get it?).
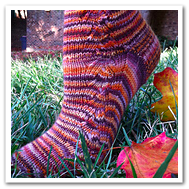
You can just start to see where the sock heel–which I had to bisect with two straights for ease of knitting–is bulging out around the middle from the added stitches.
So, that’s just fine. Now, you need to deal with the seaming.

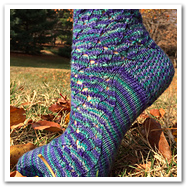
See the “heel flap seam” appear there to the right?
Cool, no?
 MamaO is Heather Ordover, author, designer, mother and knitter... not necessarily in that order. You can get posts from this blog sent directly to your inbox by signing up below, Follow her on Twitter and Like her on Facebook if you're feeling friendly-like.


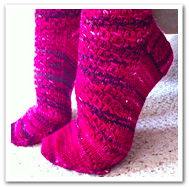
I love doing my socks toe up too. That way I can use as much of the yarn as possible.
I love the way your socks are turning out, they look great.
Joy
http://www.homeschoolblogger.com/JNLANG